Applies To: OneDrive for Business OneDrive
Want to automatically sync your Documents folder with OneDrive or OneDrive for Business? Here’s how.
TIP: You can also sync other known folders—such as Desktop, Pictures, and Music—with OneDrive or OneDrive for Business.
Before you begin
Before you sync the Documents folder on your computer with OneDrive, make sure that there’s a Documents folder in your OneDrive or OneDrive for Business folder:
- On your taskbar, select File Explorer
 .You can also open File Explorer by pressing the Windows key
 + E on your keyboard.
 - In the left pane, select your OneDrive or OneDrive for Business folder.
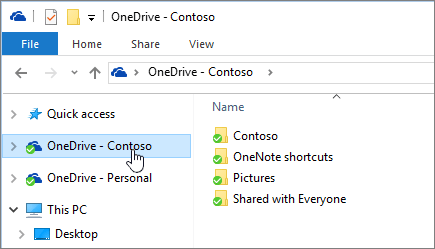
- If there isn't a Documents folder inside your OneDrive or OneDrive for Business folder, right-click inside the right pane and select New > Folder.
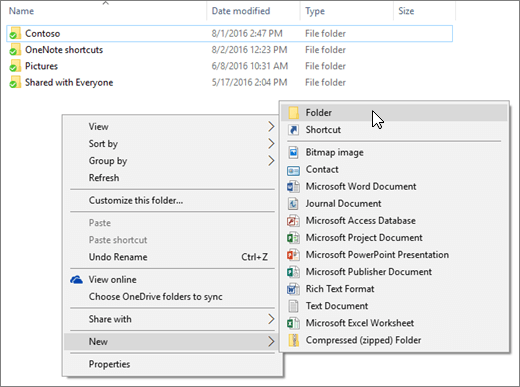
- Name the new folder Documents.
Sync your Documents folder with OneDrive
If there’s a Documents folder in your OneDrive or OneDrive for Business folder, you’re ready to sync the Documents folder on your computer with OneDrive. Here’s how:
- On your taskbar, select File Explorer
 .You can also open File Explorer by pressing the Windows key
 + E on your keyboard.
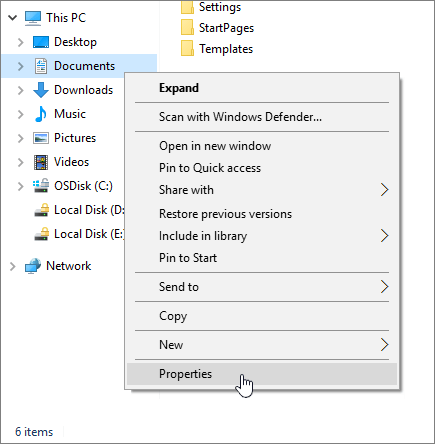
 - In the left pane, under This PC, right-click Documents and select Properties.
- Select the Location tab and select Move.
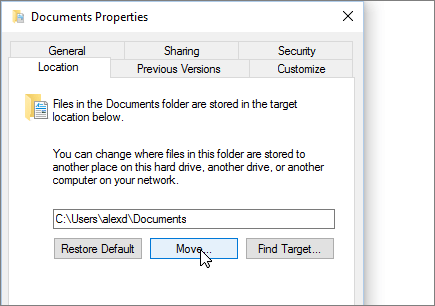
- In the left pane of the Select a Destination dialog box, select OneDrive or OneDrive for Business, select the Documents folder, and click Select Folder.
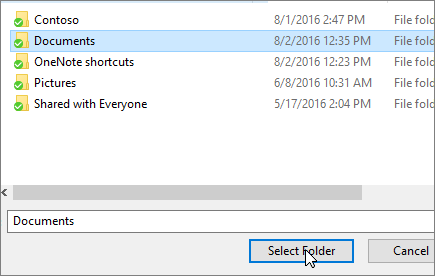
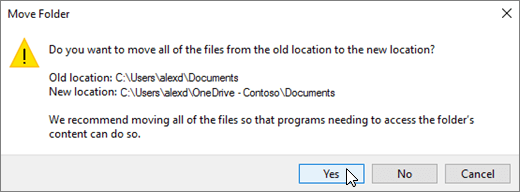
- Select Apply, and in the dialog box that appears, select Yes.
Are you an admin?
If you’re an admin, you can redirect known folders (such as Documents) to the OneDrive for Business sync location for the users in your domain. To learn more, see Redirect known folders to OneDrive for Business.
You can use is the ability to use the backspace key to move files. The backspace key is very useful because it allows you to delete files and folders that you need to keep. You are curious to know more about online crdownload file, browse this site.
ReplyDeleteThe "mscomptial" is the last step in the Microsoft Outlook Express email installation process, where you click "start" and then "OK". Once the above step has been completed, it will take you to a page where you are prompted to click on "select all". To learn more about mscomctl.ocx, visit on hyperlinked site.
ReplyDelete